Understanding Veneers and Their Uses
Wood veneers are a popular choice in interior design and furniture making due to their aesthetic appeal and versatility. If you are looking to enhance your woodworking projects, exploring the veneer hub can provide you with a wealth of resources and options. From wall panels to custom cabinetry, veneers offer a unique approach to achieving beautiful finishes without the high costs associated with solid wood. This guide will delve into the intricacies of veneers—from their types to their benefits, installation tips, and maintenance care.
What is a Veneer?
A veneer is a thin layer of wood, typically less than 1/8 inch thick, that is glued onto core panels (like wood, particle board, or medium-density fiberboard) to produce flat panels such as doors, tops, and panels for cabinets, parquet floors, and parts of furniture. Veneers are primarily used for decorative purposes and can provide an attractive finish that looks just like solid wood.
Types of Veneers Available
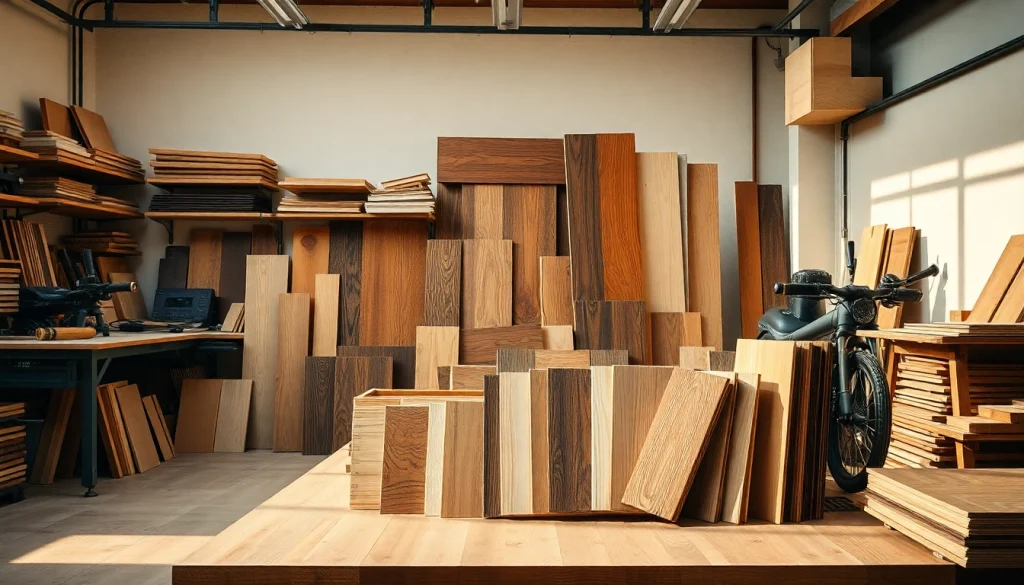
Veneers come in various types, each suited for different applications and aesthetics. The primary types include:
- Natural Veneer: Sliced directly from a log, retaining the unique characteristics of the wood species, including knots and grain patterns.
- Reconstituted Veneer: Made from a combination of wood fibers, allowing for a more uniform appearance, often used for modern designs.
- Backed Veneer: Engineered for greater durability, commonly backed with paper or fabric to improve flexibility and ease of handling.
Benefits of Using a Veneer Hub
Utilizing a veneer hub offers numerous benefits for both professionals and DIY enthusiasts, including:
- Cost-Efficiency: Veneers allow you to achieve the look of expensive woods for a fraction of the price.
- Design Versatility: Available in a plethora of styles, colors, and finishes matching any design aesthetic.
- Ease of Installation: Veneers can be easily applied to various surfaces, making them suitable for a wide range of projects.
Choosing the Right Veneer for Your Project
Factors to Consider
When selecting the right veneer, consider the following factors:
- Application: The intended use can influence your choice—whether for furniture, cabinetry, or wall coverings.
- Aesthetic Goals: Consider the visual impact of your choice; richer grains offer warmth while lighter shades can feel modern and airy.
- Durability: If the item will experience wear and tear, opt for thicker or backed veneers that offer greater resilience.
Popular Wood Species
Several wood species are favored for their remarkable aesthetic qualities and performance. Among them:
- Oak: Renowned for its strength and durability, with striking grain patterns.
- Walnut: Valued for its rich, dark hue and stunning visual depth.
- Maple: Offers a light color and fine texture, ideal for a contemporary look.
- Cherry: Known for its warm tones that evolve beautifully over time.
Matching Veneer with Design Styles
Understanding how to blend veneers with interior design styles can augment your project’s appeal. Here are ways to match veneers with different aesthetics:
- Traditional: Use oak or cherry veneers to emphasize classic elegance.
- Modern: Opt for smooth, reconstituted veneers in neutral shades.
- Rustic: Utilize raw or distressed finishes, particularly with natural veneers like reclaimed wood.
Installation Tips for Veneer Applications
Preparing the Surface
Before applying veneer, it’s crucial to prepare the surface adequately. Ensure it is clean, dry, and smooth, free from old adhesive or debris. If necessary, sand the surface lightly and vacuum away any dust.
Adhesives and Tools Required
The right adhesive can make all the difference. Common types include:
- Contact Cement: Ideal for large areas, provides strong bond upon contact.
- PVA Glue: Great for wood-to-wood applications, it requires clamping for effective bonding.
Step-by-Step Installation Process
Follow these steps for a successful veneer application:
- Measure and cut the veneer to fit your surface accurately.
- Apply a thin layer of adhesive to both the veneer and substrate.
- Allow the adhesive to become tacky before pressing the veneer into place.
- Clamp the veneer, if necessary, and let it cure per the adhesive manufacturer’s instructions.
- Trim any excess veneer and finish the edges as desired.
Maintenance and Care for Veneer Products
Cleaning Techniques
To maintain the beauty of veneer surfaces, regular cleaning is recommended. Use a soft, damp cloth to wipe surfaces, avoiding harsh chemicals that could damage the finish.
Long-Term Preservation
To extend the life of your veneer, keep it away from direct sunlight and high humidity, which can warp and fade the veneer over time. Applying a protective seal can also help maintain its luster.
Common Issues and Solutions
Veneers can occasionally present challenges, such as lifting. To remedy minor lifts, reapply adhesive under the affected area and press down securely to ensure a bond. For larger areas, consider using clamps for a stronger hold until fully set.
Frequently Asked Questions about Veneer Hub
What projects are suitable for veneer applications?
Veneers are great for furniture, cabinetry, wall panels, and decorative items. They add beauty without the hefty cost of solid wood.
How do I clean and maintain veneer surfaces?
Use a soft, damp cloth for cleaning. Avoid abrasive cleaners as they can scratch or damage the veneer finish.
Can I use veneer outdoors?
While some veneers are treated for outdoor use, generally, they are best suited for indoor applications to prevent damage from weather conditions.
What adhesives work best for veneer installation?
Contact cement and PVA glue are effective for veneer applications. Choose based on the surface and installation method you’ll use.
Are there eco-friendly options available?
Yes, look for sustainably sourced veneers and eco-friendly adhesives to ensure minimal environmental impact while decorating.